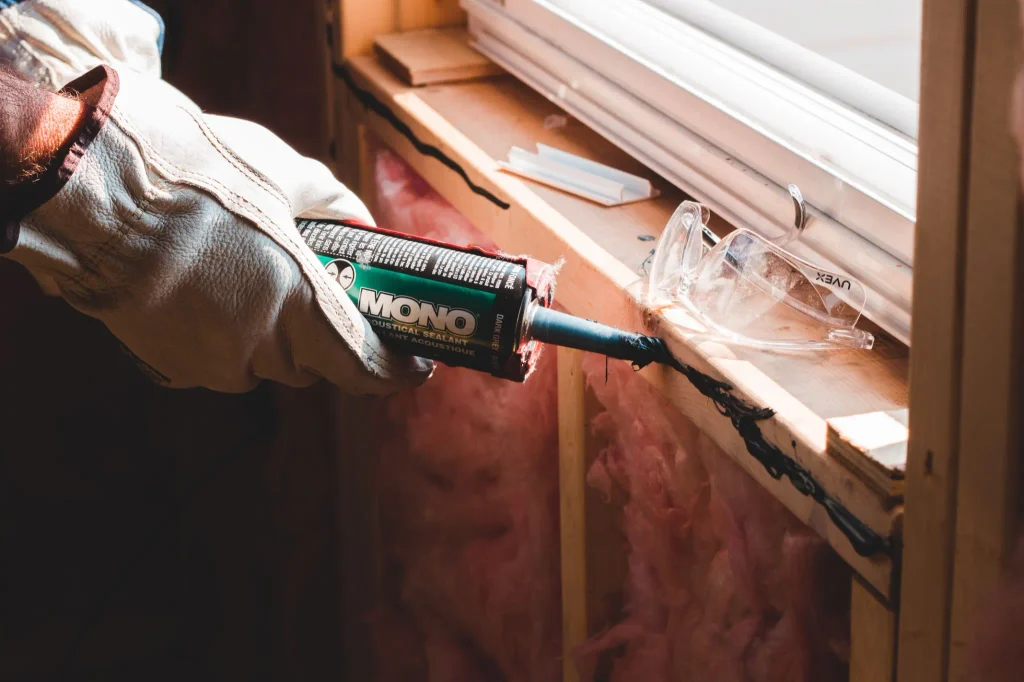
Window and door air leaks can make a room uncomfortable even when the thermostat shows the right temperature. Fortunately, many drafts can be found and sealed without replacing every window or starting a major renovation. First, locate the actual leak. Then match the repair material to the part that leaks.
This guide walks you through a 15-minute inspection, explains the difference between caulk and weatherstripping, and covers practical options for homeowners and renters. It also shows when a draft points to a larger problem that belongs in professional hands.
Window and Door Air Leaks: The Short Answer
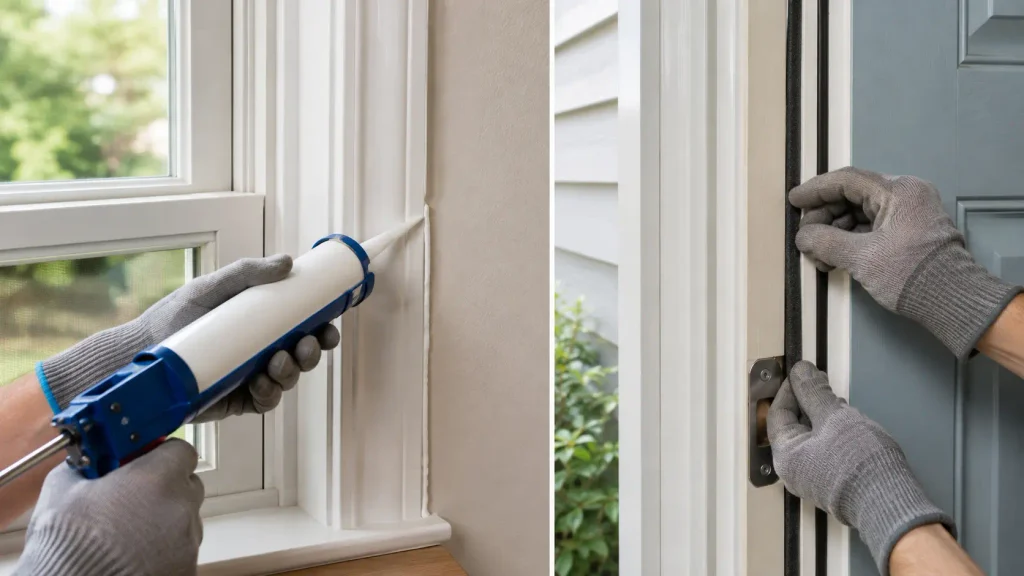
Use caulk for gaps that do not move, such as cracks between a window frame and surrounding trim. Use weatherstripping where two surfaces move against each other, such as a door and its jamb or a window sash and frame.
Before buying supplies, inspect each opening and note where you feel moving air. Clean and dry the surface, remove loose material, and choose a product made for that location. A small, neat repair usually works better than applying a thick bead of caulk everywhere.
The U.S. Department of Energy describes caulking and weatherstripping as simple, effective air-sealing methods. ENERGY STAR also recommends air sealing as part of improving household comfort and efficiency. However, no single repair guarantees a specific dollar amount of savings. Results depend on the size and number of leaks, local weather, energy prices, and the condition of the home.
A 15-Minute Check for Window and Door Air Leaks
Choose a cool, windy day if possible. Turn off portable fans and keep exterior doors closed during the check. You need only a tissue, painter’s tape, and your phone for notes or photos.
Minutes 0–3: Look for visible gaps
Inspect the interior edge of each window and exterior door. Look for cracked or missing caulk, daylight around a closed door, damaged weatherstripping, and trim that has pulled away from the wall. Also check for peeling paint, water stains, soft wood, or mold. Those signs may indicate a moisture problem rather than a simple draft.
Minutes 3–6: Use your hand or a tissue
Move your hand slowly around the frame. Then hold a lightweight tissue near suspected areas. Fluttering can help reveal airflow. Do not use a candle, lighter, or other open flame. Curtains, paper, cleaning products, and unexpected air movement make a flame test an unnecessary fire risk.
Minutes 6–9: Test moving parts
Open and close each operable window. Lock it and check whether the sash pulls firmly against the weatherstripping. A lock that no longer draws the window tight may need adjustment or repair. For doors, close and latch them before checking the top and sides.
Minutes 9–12: Check the door bottom
Look for daylight under the door. Inspect the sweep, threshold, and bottom corners. A worn sweep may leave a long horizontal gap, while poor alignment often creates a larger opening at one corner. Confirm that the door can still open, close, and latch normally.
Minutes 12–15: Mark and classify each leak
Place a small piece of painter’s tape beside every problem area. Label it:
- Stationary gap: likely caulk
- Moving joint: likely weatherstripping
- Door-bottom gap: sweep or threshold adjustment
- Damage or moisture: investigate before sealing
- Unknown or widespread leak: consider a professional energy assessment
This short check will not find every hidden leak in a house. It does prevent a common mistake: buying one product and applying it to every opening.
Why Small Gaps Affect Comfort
Window and door air leaks allow outdoor air to enter and conditioned indoor air to escape.
A draft creates a local stream of outdoor air. In winter, that can make the area near a window feel colder. In summer, humid outdoor air can enter while cooled indoor air escapes. The HVAC system may run longer as it tries to maintain the set temperature.
Windows and doors are only part of a home’s air-leakage picture. Attic penetrations, recessed lights, plumbing openings, rim joists, and duct connections can also matter. If you seal several obvious window and door gaps but the house remains drafty, the largest leaks may be elsewhere.
For broader ways to cut household energy use, see How to Lower Your Electric Bill: 10 Easy Ways to Save. If your bill changed suddenly, use Why Is My Electric Bill So High? to check other possible causes.
Caulk vs. Weatherstripping: What Is the Difference?
The easiest rule to remember is this: caulk seals stationary gaps; weatherstripping seals moving joints.
| Material | Best location | Common examples | Important limitation |
|---|---|---|---|
| Caulk | Gaps that do not move | Between trim and wall; small cracks around a fixed frame | Can crack or detach if placed where surfaces move |
| Weatherstripping | Parts that open and close | Door jambs; operable window sashes | Must compress without preventing normal operation |
| Door sweep | Bottom of an exterior door | Gap between door slab and threshold | Wrong height can drag or keep the door from closing |
| Removable rope caulk | Temporary seasonal gaps | Renter-friendly window treatment | Not intended as a permanent exterior repair |
Choose a caulk rated for the surface and location. Paintable acrylic latex products are convenient for many interior trim gaps. Exterior joints may require a flexible exterior-grade sealant that tolerates sunlight, rain, and temperature changes. Follow the manufacturer’s instructions because compatible materials, joint size, curing time, and painting requirements vary.
Weatherstripping comes in foam tape, rubber or vinyl gaskets, felt, tension seals, and other profiles. The correct product fills the gap while allowing the window or door to operate and latch safely.
Tools and Materials You May Need
Most small projects require only a few items:
- Painter’s tape and a tissue for inspection
- Vacuum or brush, mild cleaner, and dry cloth
- Putty knife or approved caulk-removal tool
- Caulk gun and suitable caulk
- Weatherstripping sized for the gap
- Scissors or utility knife
- Measuring tape
- Door sweep and appropriate fasteners, if needed
- Work gloves and eye protection
Do not scrape or sand painted window or door surfaces in an older home until you have considered lead safety. The EPA warns that renovation work in pre-1978 homes can create dangerous lead dust. If the home was built before 1978 and the work may disturb painted surfaces, follow EPA lead-safe practices or hire a lead-safe certified contractor.
How to Seal Air Leaks Around Windows
1. Find the exact path
Determine whether air is coming through a fixed trim joint, around an operable sash, near the lock, or through a damaged frame. Condensation between the panes of an insulated window is different: it usually indicates a failed glass seal, which surface caulk will not repair.
2. Prepare the surface
Remove loose, failed caulk only where necessary. Clean away dust, grease, and debris. Allow the joint to dry fully. New caulk applied over dirt or unstable material is unlikely to bond well.
3. Caulk stationary cracks
Apply a controlled bead to the intended joint. Smooth it according to the product directions and remove masking tape before the material skins over, if the instructions recommend that method. More is not always better. A tidy bead that contacts both sides of the joint is the goal.
4. Weatherstrip moving sashes
Measure the sash channel and choose a profile that fits. Apply it to a clean, dry surface without covering hardware or drainage paths. Close and lock the window to test compression. It should seal firmly without requiring excessive force.
5. Do not block drainage
Never caulk over window weep holes or other manufacturer-designed drainage openings. Trapped water can damage the sill, wall, or frame. If you cannot identify an opening, check the window documentation or ask a qualified installer before sealing it.
How to Seal Drafts Around Exterior Doors
Close and latch the door before diagnosing the gap. If the door rubs, hangs unevenly, or does not latch, correct the alignment before adding thick weatherstripping.
Start at the top corner and inspect the weatherstripping along the head and both jambs. Replace sections that are brittle, flattened, torn, or missing. Continuous contact is important, especially at the upper and lower corners.
Next, inspect the threshold and sweep. Adjust an adjustable threshold in small increments so it meets the door bottom evenly. If replacing a sweep, measure the door width and confirm that the new product is suitable for the door material. The sweep should touch the threshold without scraping heavily across the floor.
Do not seal an intentional combustion-air opening, mechanical vent, or required fire-safety clearance. If a door is near a fuel-burning appliance or separates the house from an attached garage, ask a qualified professional about applicable safety and code requirements.
Renter-Friendly Ways to Reduce Drafts
Renters can improve comfort without making a permanent alteration. First, photograph the gap and report damaged windows, failed locks, water intrusion, or exterior-door problems to the landlord or property manager. Those items may require a property repair rather than a temporary covering.
For simple seasonal drafts, consider:
- Removable adhesive weatherstripping
- A fabric draft stopper at the bottom of a door
- Removable rope caulk around seasonal window gaps
- A shrink-film window insulation kit
- Well-fitted curtains or cellular shades
Read removal instructions before applying adhesive to painted or finished surfaces. Test a hidden area when appropriate. Get written permission before using permanent caulk, drilling holes, replacing hardware, or installing a screw-mounted door sweep. Also remember that a curtain or film reduces discomfort but does not repair rot, water intrusion, or a failed insulated-glass unit.
Common Air-Sealing Mistakes
Some window and door air leaks are easy to repair, but applying the wrong material can create new problems.
Sealing before finding the leak
Cold glass can make air near a window circulate, even when there is no major crack. Confirm moving air before assuming every cold spot needs caulk.
Using caulk on a moving joint
Caulk placed between a sash and frame can prevent the window from opening or fail after repeated movement. Use appropriately sized weatherstripping instead.
Installing weatherstripping that is too thick
An oversized strip can keep a door from latching or strain window hardware. Choose a profile that compresses enough to seal without interfering with operation.
Covering water or structural damage
Fresh caulk can hide a stain without fixing its cause. Repair flashing, roofing, siding, or drainage problems first. Wet or decayed wood needs evaluation and repair.
Blocking required openings
Do not cover weep holes, intentional vents, combustion-air openings, or other safety features. When in doubt, stop and identify the opening.
When Window and Door Air Leaks Need a Professional
A basic draft is often a reasonable DIY project. Call a window contractor, carpenter, building-envelope specialist, HVAC professional, or energy auditor when you find:
- Soft or rotten framing
- Water stains, active leaks, or recurring mold
- A door or window that is badly warped or out of square
- Large gaps between the frame and wall
- Cracks that suggest structural movement
- Condensation or fog trapped between insulated glass panes
- Persistent drafts after visible gaps have been repaired
- Many rooms with unexplained leakage
- Safety questions involving a fireplace, furnace, water heater, or other combustion appliance
- Painted surfaces in a pre-1978 home that must be cut, scraped, or sanded
A blower-door test performed as part of a professional home energy assessment can measure overall airtightness and help locate leakage paths. This can be more useful than replacing windows based on guesswork.
Check the Repair and Maintain It
After the product has cured or set, repeat the hand-and-tissue check under similar weather conditions. Open, close, lock, and latch every repaired window or door. Make sure drainage, ventilation, and safety functions remain unchanged.
Inspect caulk and weatherstripping at least once a year and after severe weather. Replace materials that have cracked, pulled away, flattened, or become brittle. Seasonal inspection is also a good time to review your thermostat schedule. Best Thermostat Settings for Summer and Winter to Save Energy explains how temperature settings and home comfort work together. You can also compare automated controls in Do Smart Thermostats Really Save Money?.
Quick Repair Guide
| What you find | Likely first step | DIY or professional? |
|---|---|---|
| Small fixed trim gap | Clean and apply suitable caulk | Usually DIY |
| Air around an operable sash | Fit weatherstripping | Usually DIY |
| Daylight below a door | Adjust threshold or install a sweep | DIY if door is aligned |
| Loose lock or poor sash contact | Adjust or repair hardware | DIY or window technician |
| Fog between glass panes | Evaluate insulated-glass unit | Professional |
| Rot, water, or mold | Find and repair moisture source | Professional recommended |
| Drafts throughout the house | Consider a home energy assessment | Professional helpful |
Frequently Asked Questions
Can I caulk a window shut for winter?
Do not permanently seal an operable window that may be needed for emergency escape or ventilation. Use a removable product only where appropriate, and keep required egress windows fully functional.
Should I caulk inside or outside a window?
It depends on where the leak occurs and how the window was installed. Interior trim gaps and exterior frame joints serve different purposes. Never cover drainage openings, and do not use interior caulk to hide an unresolved exterior water leak.
How do I know what size weatherstripping to buy?
Measure the gap at several points. Choose a product designed to compress within that range. If the door stops latching or the window becomes difficult to lock, the strip may be too thick or incorrectly positioned.
Are window insulation film kits worth using?
They can reduce drafts and improve comfort as a temporary seasonal measure, especially for renters. They do not repair failed glass seals, damaged frames, water leaks, or structural problems.
Will sealing windows and doors lower my energy bill?
It can reduce uncontrolled air movement and HVAC workload, but savings vary. The largest benefit may be improved comfort. Homes with major leaks usually have more opportunity than homes that are already well sealed.
Final Thoughts
Fixing window and door air leaks does not require covering every visible seam. Start with a short inspection. Use caulk only on stationary gaps, weatherstripping on moving parts, and a properly fitted sweep at a door bottom. Preserve drainage and safety openings, and treat moisture, structural movement, and old painted surfaces as separate issues.
A small, carefully chosen repair can be more useful than an expensive product applied in the wrong place. Find the path, choose the right material, test the result, and call a professional when the evidence points beyond a simple draft.
Sources
- U.S. Department of Energy: Consumer Guide to Air Sealing the Home
- ENERGY STAR: Why Seal and Insulate?
- U.S. Department of Energy: Resources for Renters
- U.S. Environmental Protection Agency: Lead-Safe Renovations for DIYers
This article provides general educational information. Product compatibility, building conditions, lease terms, and local codes vary. Follow manufacturer instructions and consult a qualified professional when safety, moisture, structural damage, or lead paint may be involved.